.png)
AUTUMN GARLAND (WITH FREE ACORN PATTERN)
- Emma

- Oct 2, 2020
- 2 min read
Hi and welcome back to the blog!
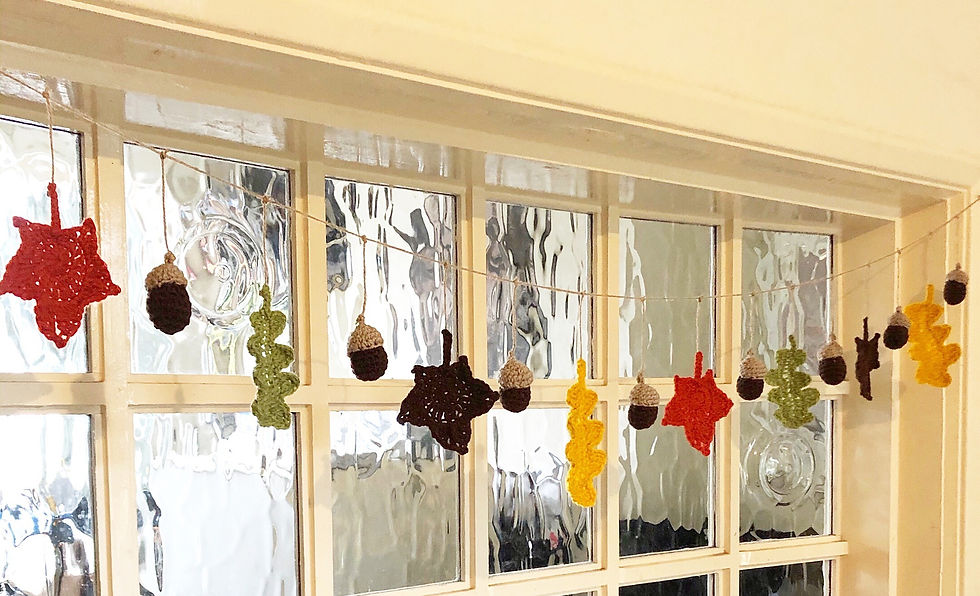
This week I have loved (loved, loved) making a lovely autumn garland for our living room.
I have been wanting to make one for so long and this year was the year!
I chose autumnal colours for the leaves; a mossy green, mustard yellow, burnt orange and chestnutty brown (all from my stash) and I used all DK, apart form the mustard which was Aran, to give a varying size.
I used the tutorials from Happy Berry Crochet on YouTube, which are free, and you can find them below! They were really easy to follow.
I used a 4mm for the DK yarn and 5mm for the Aran.
For the acorns I used the same chestnutty brown colour for the nut and some almond coloured yarn (mine was Stylecraft Bellisimmo) for the cap (this is slightly lighter than dk but was fine), all with a 4mm hook.

This is the free pattern for my acorn if you fancy making a garland too! You could even change the colour.
For the acorns (I made 9)
Start with the nut colour,
1- MR, sc 6 (6)
2- Inc x 6 (12)
3- Inc, sc 1 (18)
4- Sc around (18)
5- Dec, sc 1 x 6 (12)
6-8- Sc around (12), stuff
9- Dec x 6 (6)
Fasten off leaving a tail to weave in and out of the remaining loops and pull to close. Sew in end.
For the cap, use the almond colour,
Leaving a longer tail at the beginning,
(around 7 inches)
1- MR, sc 6 (6)
2- Inc x 6 (12)
3- Inc, sc 1 x 6 (18)
4- Sc around (18)
5- Dec, sc 1 x 6 (12)
Fasten off leaving a long end to attach.
Picking up the beginning yarn through the top of the cap with a ch st, ch 3, sl st into the second ch from the hook, sl st into the next ch, and sl st into the cap to finish. Fasten off and sew in end.
Place the cap on the nut and hold in place while you sew around using the long end you left.
For construction, I used a length of jute twine and then measured a piece of twine for each leaf and acorn (4 inches long), which I knotted twice at the one end then using my tapestry needle, fed it through the stems. To attach it to the main piece I placed my central item first (for me it is an acorn but you can use whatever works for your make) secured it on with a knot, then loosely attached all the others with knots, but I left room to be able to move them into the right spacing before pulling the knots tight and trimming off any excess.

And there you have it! I just popped some eyelets into the wood of our window frame to attach it to but you could possibly use tape or even Bluetak perhaps.
Thanks for stopping by today! Hope you love the garland as much as I enjoyed making it!
Feel free to tag me over on Insta (@made_lovingly) I love to see your makes 😊


Comments